DHR/AR Rheometer: Configuring the Instrument Options
To configure the DHR/AR Rheometer using TRIOS software:
- Click the TRIOS button
 at the top-left corner of the application and then click Options.
- Proceed to the applicable section below for configuration instructions.
Setting Gap Options
To configure the instrument Gap options:
- Open the TRIOS Options screen.
- Select AR or Discovery HR > Gap.
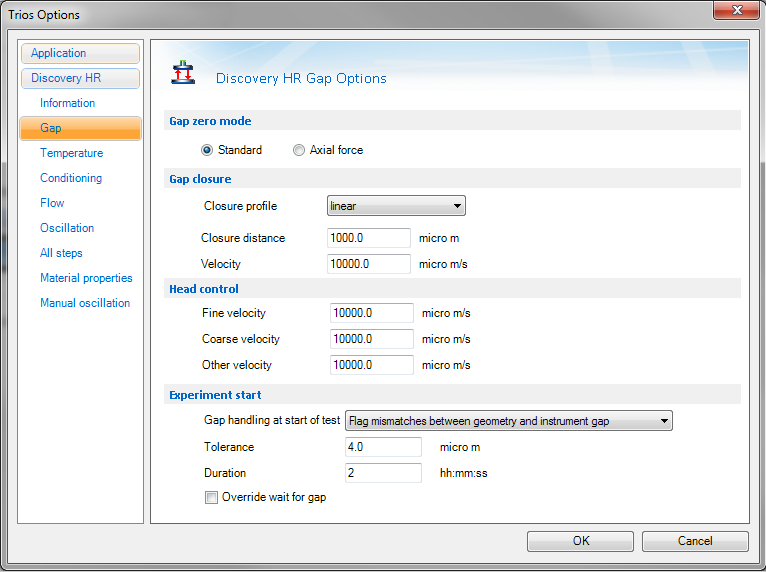
- Gap zero mode:
- DHR: Select between Standard and Axial force
- AR2000ex: Select between Decelaration and Axial force
- AR1500ex: Only operates in Decelaration mode
- AR-G2: Only operates in Standard mode
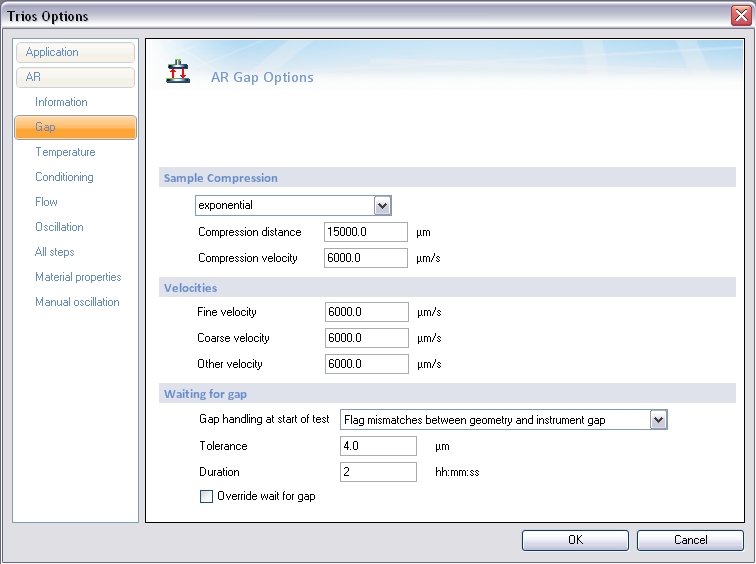
- Enter the Sample Compression options values:
- Select the sample compression option from the drop-down list.
- none: The gap is closed at a continuous velocity (as set under the Coarse velocity entry.) The sample Compression distance is not used.
- exponential: When the gap closes to the distance specified in the Compression distance entry, the gap is closed at an exponentially decreasing rate. The initial velocity is that specified in the Compression velocity entry.
- linear: When the gap closes to the distance specified in the Compression distance entry, the gap is closed at the Compression velocity value.
- axial force: Over the Compression distance, the velocity will slow down at a rate proportional to the increase in the speed of axial force built up.
- Enter the Compression distance: When Sample compression mode is used, the rheometer moves to this distance (the gap above the zero datum point) and then operates in the specified compression mode.
- Enter the Compression velocity: The initial closure velocity used in Sample compression mode.
- Enter the Velocities options values:
- Fine velocity: The velocity of the rheometer head when moving to the measuring geometry gap and less than 10 mm above the zero point). Above 10 mm, the Coarse velocity setting is used.
- Coarse velocity: The velocity of the rheometer head when moving to gap and 10 mm above the zero point. Below 10 mm, the velocity slows to that selected as the Fine velocity.
- Other velocity: The velocity of the rheometer head when manually closing the gap to within 5 mm (for gap zero determination).
- Enter the Waiting for gap options values:
- Select the Gap handling at start of test action from the drop-down menu:
- Use measured sample gap. This is the default setting. The gap reported by the instrument firmware at the beginning of the test is the default start gap.
- Flag mismatches between geometry and instrument gap. Use this option if you want to verify that the geometry gap has been set correctly before starting the experiment.
- Tolerance: When setting a gap, this value defines how close the measured gap has to be to the requested gap before the duration time is started.
- Duration: When setting a gap, this value defines how long the measured gap has to be within the Tolerance before it is considered to be at gap.
- Check Override wait for gap for the experiment to start irrespective of the measured gap.
Back to top
Setting Temperature Control Options
To configure the instrument Temperature Control options:
- Open the TRIOS Options screen.
- Select AR or Discovery HR > Temperature.
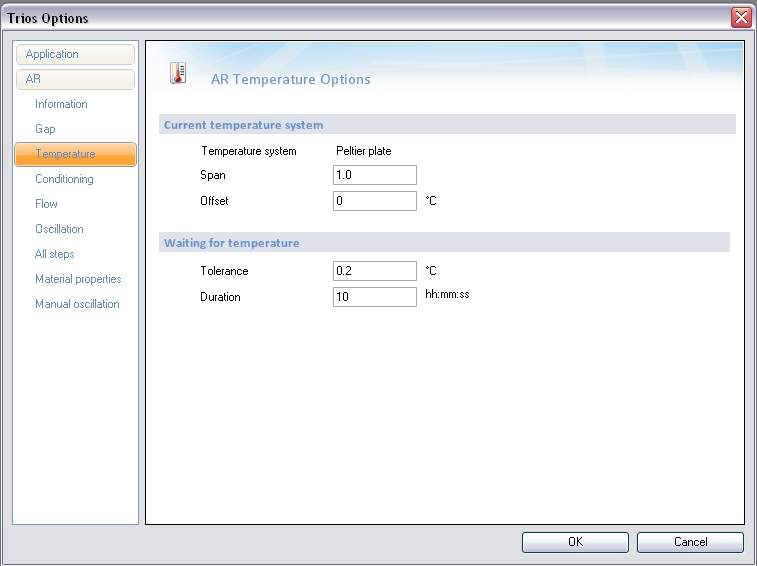
- Enter the values for the Current temperature system:
- Temperature system: Displays currently installed Smart Swap™ temperature system.
- Span / Offset: The temperature control devices on the rheometer can be independently calibrated by calculating a span and offset. For additional information, see Offset and Span Calibration Methods for DHR/AR.
- Enter the values for Waiting for temperature:
- Tolerance: When setting a temperature, this value is how close the measured temperature has to be to the requested temperature before the duration time is started.
- Duration: When setting a temperature, this value is how long the measured temperature has to be within the tolerance before it is considered to be at temperature.
Back to top
Setting Conditioning Options
To configure the instrument Conditioning options:
- Open the TRIOS Options screen.
- Select AR or Discovery HR > Conditioning.
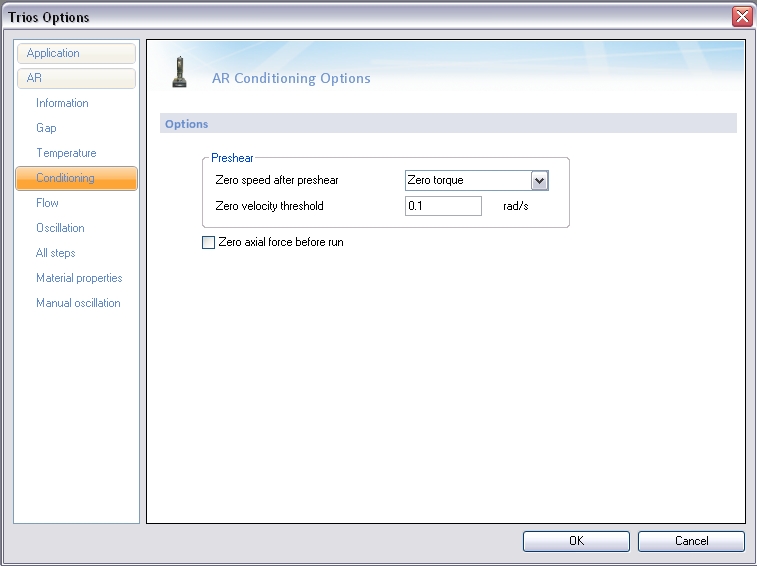
- Select the Zero speed after preshear from the drop-down menu:
- Zero torque: Torque is zeroed at the end of preshear and the test only continues when the velocity drops below the Zero velocity threshold.
- Zero velocity: Velocity is zeroed at the end of preshear and the test only continues when the velocity drops below the Zero velocity threshold.
- Enter the Zero velocity threshold value, which is the value the velocity must drop below to meet zero condition.
- Zero axial force before run: If checked, the axial force is set to zero before the first measurement step.
- NOTE: If the axial force is zeroed before the sample has fully relaxed after loading, an offset could be incorporated into the data.
Back to top
Setting Flow Options
To configure the instrument Flow options:
- Open the TRIOS Options screen.
- Select AR or Discovery HR > Flow.
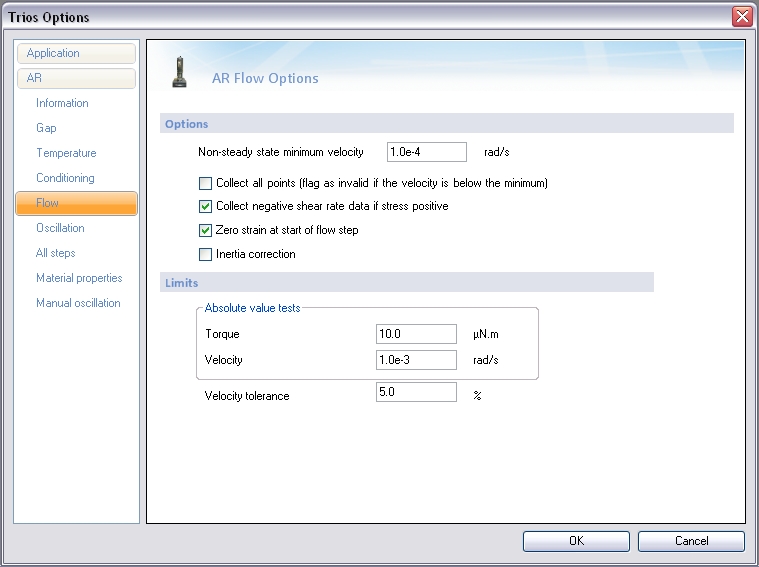
- Non-steady state minimum velocity: The minimum acceptable velocity when performing flow tests other than Steady State Flow. If the measured velocity is less than this value, the software displays the message Angular velocity too low, and no data point is collected.
- Select your desired Flow Options:
- Collect all points (flag as invalid if the velocity is below the minimum): Collects all data points and flags data as invalid if velocity falls below the Non-steady state minimum velocity value.
- Collect negative shear rate data if stress positive:
- Zero strain at start of flow step: Select this option to have the recorded value of strain reset to zero for each step. If this option is not selected, any reading of strain is cumulative from the start of the procedure.
- Inertia correction: Applies the flow inertia correction. Refer to Inertia Correction for the DHR/AR for additional information.
- Set the AR Flow Limits:
- Torque / Velocity: Values stored in the experimental results are flagged if they are deemed to be invalid, either because they are close to the limits for the instrument, or because the values being returned are not correct for the procedure being run. The limits can be set on this screen tab. Generally, the default values are sufficient for all test protocols.
- Velocity tolerance: Values stored in the experimental results are flagged if they are deemed to be invalid, either because they are close to the limits for the instrument, or because the values being returned are not correct for the procedure being run. The limits can be set on this screen tab. Generally, the default values are sufficient for all test protocols.
Back to top
Setting Oscillation Options
To configure the instrument Flow options:
- Open the TRIOS Options screen.
- Select AR or Discovery HR > Oscillation.
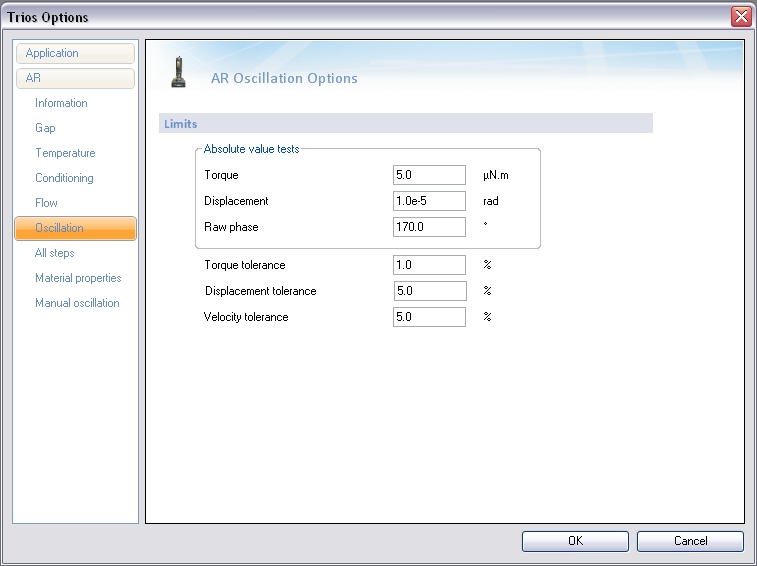
- Torque / Displacement: Values stored in the experimental results are flagged if they are deemed to be invalid, either because they are close to the limits for the instrument, or because the values being returned are not correct for the procedure being run.
- Raw phase: The measured phase difference between the sinusoidal torque and displacement in an oscillation experiment. The raw phase is corrected for system inertia to obtain the "rheological" phase angle, delta.
- Enter the tolerance for Torque, Displacement, and Velocity.
Back to top
Setting Options for All Steps
To configure options for all test steps:
- Open the TRIOS Options screen.
- Select AR or Discovery HR > All steps.
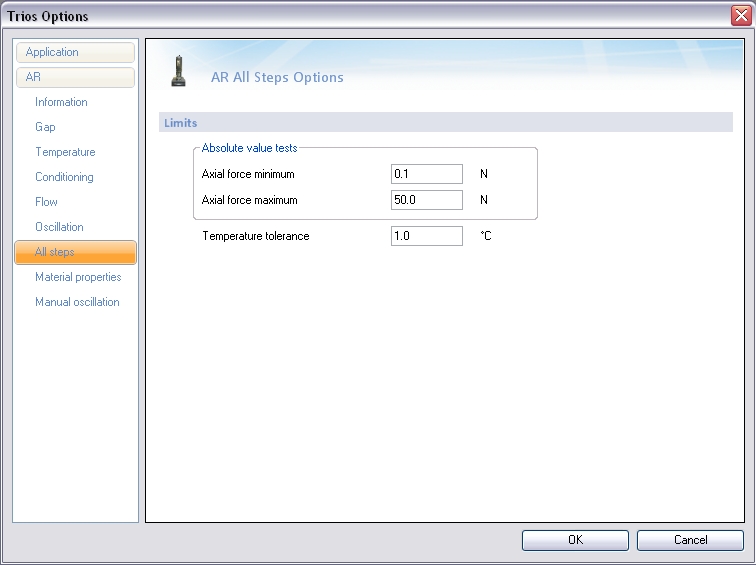
- Set the minimum and maximum values for Axial force.
- Set the Temperature tolerance.
Back to top
Setting Material Properties Options
To configure the Material Properties:
- Open the TRIOS Options screen.
- Select AR or Discovery HR > Material Properties.
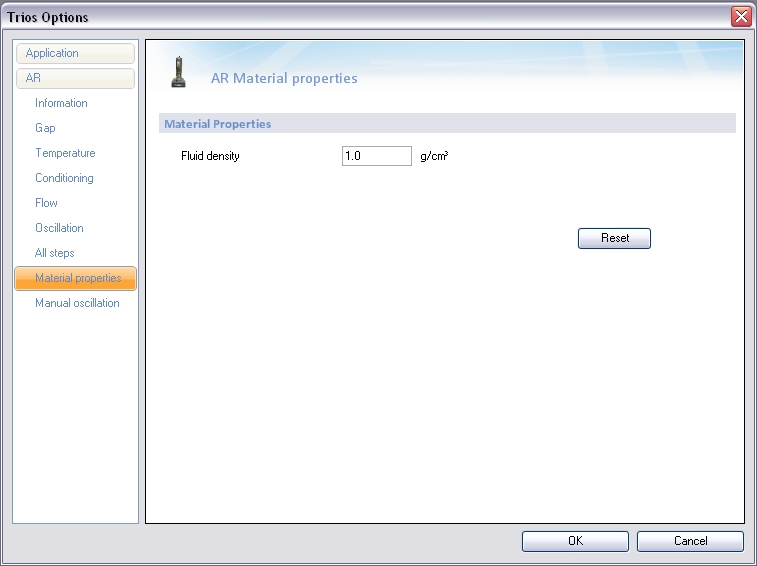
- Enter the Fluid density. This value is used for fluid inertia correction of oscillation data. Fluid inertia corrections are only significant when the gap is larger than 1 mm, the viscosity is greater than 1000 mPa, and the frequency is greater than 10 rad/s.
Back to top
Setting Manual Oscillation Options
To configure the Material Properties:
- Open the TRIOS Options screen.
- Select AR or Discovery HR > Manual oscillation.
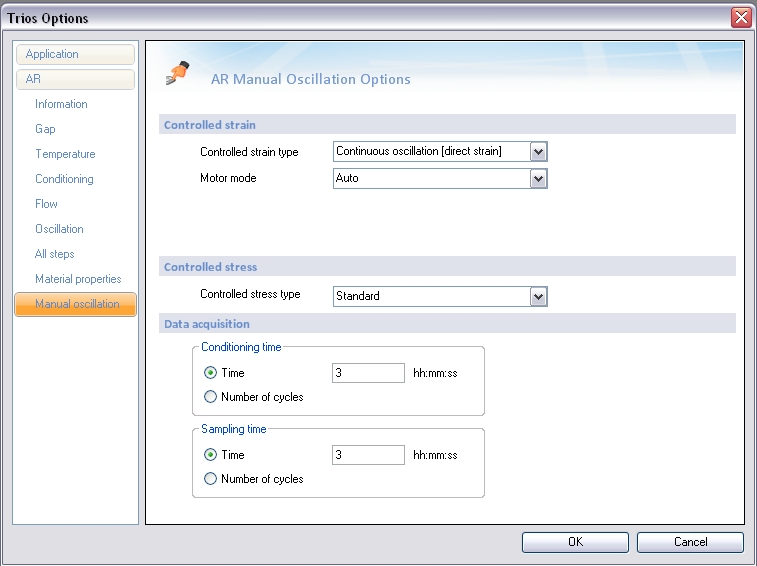
- Select the Controlled strain type:
- Continuous oscillation [direct strain]: In this mode, the motor torque is adjusted during the oscillation cycle to apply the command strain. Parallel superposition and harmonic analysis are not available in this mode.
- Precision: This mode controls the strain by adjusting the motor torque at the end of an oscillation cycle by an iterative approach. Several test cycles are necessary to reach the target strain.
- Motor mode: The 'stiffer' the motor mode, the faster the transient response of the drive system. A faster transient response gives the ability to step change speed in a shorter time, and to better cope with difficult non-linear sample behavior. However, a fast transient response leads to the possibility of increased noise levels on the reported torque level.
Generally, it is best to leave the setting at auto, since this automatically changes the stiffness of the drive system depending on the apparent stiffness of the sample.
- Select the Controlled stress type:
- Standard: Oscillation stress/torque is applied to the sample during data acquisition only.
- Continuous oscillation: Oscillation torque/stress is applied continuously during the test. Selecting Continuous oscillation will ensure that there is no break in the oscillation. This prevents the motor from drifting between measurements when testing soft or low viscosity samples. Parallel superposition is not available in this mode.
- Set the Conditioning time options:
- Time: This is the time, in seconds, during which an oscillation torque is applied before enabling the data acquisition.
- Number of cycles: This is the period, in number of oscillation cycles, during which an oscillation torque is applied before enabling the data acquisition.
- Set the Sampling time values:
- Time: This is the time, in seconds, during which an oscillation torque is applied and data are acquired. Note that the minimum time is always the time required for one cycle of oscillation and overwrites the user selection.
- Number of cycles: This is the period, in number of oscillation cycles, during which an oscillation torque is applied and data are acquired. The minimum value is one cycle.
Back to top
